

本地部署 ONLYOFFICE 文档社区版
记录下本地部署 ONLYOFFICE 文档社区版的过程和遇到的问题
ONLYOFFICE 是一个免费且开源的办公套件,用于在网页、桌面和移动平台上创建、编辑和协作处理文本文档、电子表格、演示文稿、PDF 表单和常规 PDF 文件
安装与使用
使用 Docker 部署安装
环境说明(安装适用于 arm64 的 ONLYOFFICE Docs Docker 版本)
- Docker version 26.1.3, build 26.1.3-0ubuntu1~24.04.1
- onlyoffice/documentserver 8.3.2
运行命令
拉取镜像
sh
docker pull onlyoffice/documentserver:8.3.2启动容器
sh
sudo docker run -i -t -d -p 80:80 --name onlyoffice onlyoffice/documentserver:8.3.2在 Vue 项目中使用
安装依赖
sh
pnpm install @onlyoffice/document-editor-vue在项目中使用(以 Vue 3 为例)
vue
<script setup lang="ts">
import type { IConfig } from '@onlyoffice/document-editor-vue'
import { DocumentEditor } from '@onlyoffice/document-editor-vue'

const props = defineProps<{
  /* 文件地址 */
  url: string
  /* 用来识别文档的唯一文档标识符 */
  key: string
  /* 文件名 */
  fileName: string
  /* 文件类型 */
  fileType: string
}>()

/*
 * 根据文件类型返回对应的文档类型

 * 这里只处理了常见的文档类型,如果需要处理更多的文档类型,请参考文档
 * https://api.onlyoffice.com/zh-CN/docs/docs-api/usage-api/config/#documenttype
 */
const documentType = computed(() => {
  if (['doc', 'docx'].includes(props.fileType)) {
    return 'word'
  }
  if (['ppt', 'pptx'].includes(props.fileType)) {
    return 'slide'
  }
  if (['xls', 'xlsx'].includes(props.fileType)) {
    return 'cell'
  }
  if (['pdf'].includes(props.fileType)) {
    return 'pdf'
  }
})

const config = computed<IConfig>(() => ({
  document: {
    fileType: props.fileType,
    key: props.key,
    title: props.fileName,
    url: props.url,
    permissions: {
      // 隐藏下载按钮
      download: false,
    },
  },
  documentType: documentType.value,
  editorConfig: {
    mode: 'view',
    lang: 'zh-cn',
  },
}))

const documentServerUrl = 'http://localhost:3000'
</script>

<template>
  <DocumentEditor id="docEditor" :documentServerUrl="documentServerUrl" :config="config" />
</template>遇到的坑
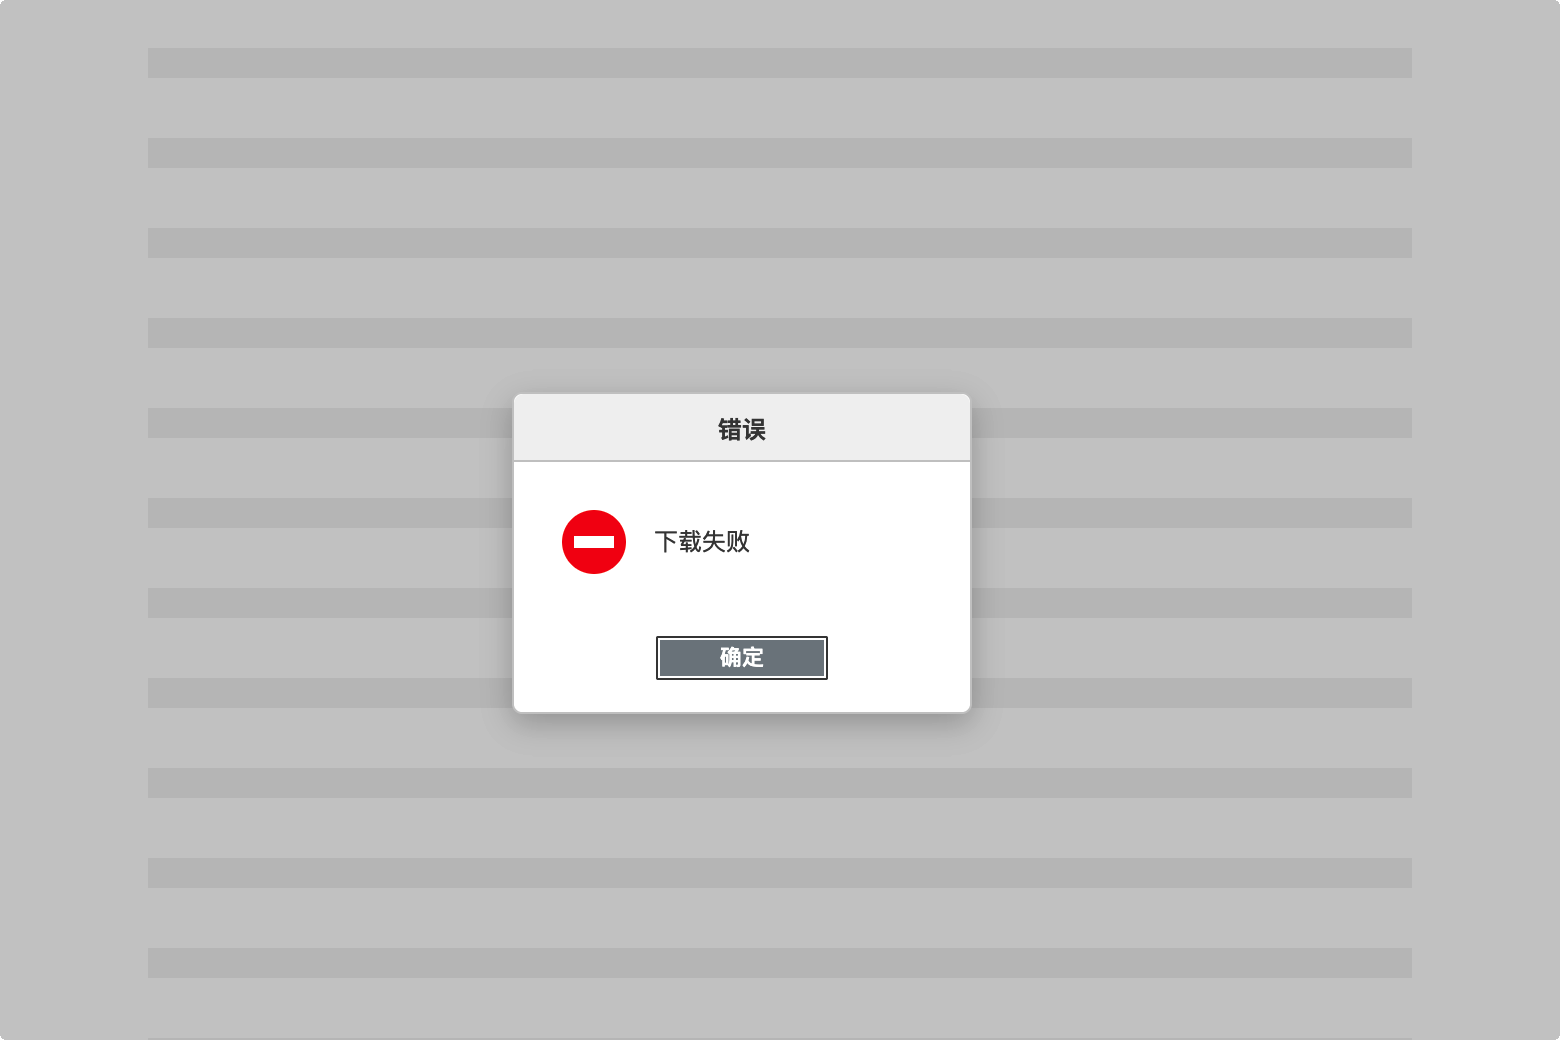
前端本地服务打开文档提示下载失败
进入 ONLYOFFICE 容器
bash
sudo docker exec -it onlyoffice bash修改 local.json 文件
bash
nano /etc/onlyoffice/documentserver/local.json添加如下内容
json
{
  "services": {
    "CoAuthoring": {
      "request-filtering-agent": {
        "allowPrivateIPAddress": true,
        "allowMetaIPAddress": true
      }
    }
  }
}重启服务
bash
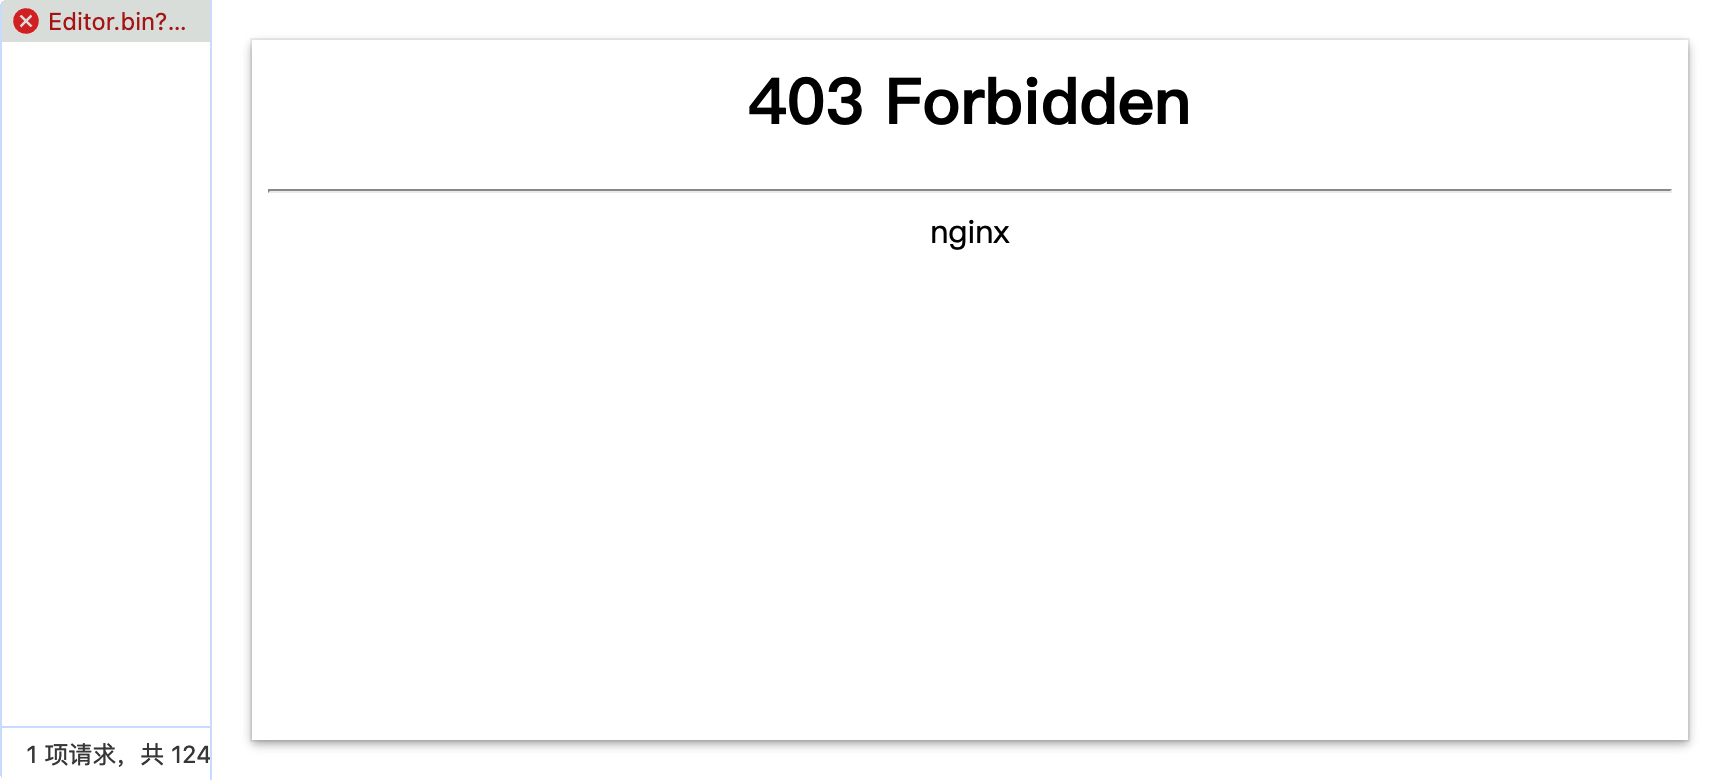
sudo supervisorctl restart all提示 Editor.bin 403 (Forbidden)
进入 ONLYOFFICE 容器
bash
sudo docker exec -it onlyoffice bash修改 /etc/nginx/includes/ds-docservice.conf 文件
bash
nano /etc/nginx/includes/ds-docservice.conf注释以下内容
sh
  if ($secure_link = "") {
  #   return 403;
}重启 Nginx
sh
sudo nginx -s reload复制容器中的配置文件到本地
在第一次启动容器后,建议先将容器中的配置文件复制到本地
sh
sudo docker cp onlyoffice:/etc/onlyoffice/documentserver/local.json /home/ubuntu/onlyoffice/config/local.json优势
- 修改配置方便
- 删除容器后,配置文件不会丢失
- 方便后续的升级和迁移
最终安装命令
/home/ubuntu/onlyoffice/config/local.json 文件内容如下
当
local.json文件配置不完整时服务启动会失败,建议将其复制到本地再修改
json
{
  "services": {
    "CoAuthoring": {
      "requestDefaults": {
        "rejectUnauthorized": false
      },
      "request-filtering-agent": {
        "allowPrivateIPAddress": true,
        "allowMetaIPAddress": true
      },
      "token": {
        "enable": {
          "request": {
            "inbox": false,
            "outbox": false
          },
          "browser": false
        },
        "inbox": {
          "header": "Authorization",
          "inBody": false
        },
        "outbox": {
          "header": "Authorization",
          "inBody": false
        }
      },
      "sql": {
        // 省略默认生成的配置
      },
      "secret": {
        // 省略默认生成的配置
      }
    }
  },
  "rabbitmq": {
    // 省略默认生成的配置
  },
  "storage": {
    // 省略默认生成的配置
  }
}sh
sudo docker run -d -i -t \
  --name onlyoffice \
  -v /home/ubuntu/onlyoffice/config/local.json:/etc/onlyoffice/documentserver/local.json \
  -p 8088:80 \
  -e JWT_ENABLED=false \
  -e USE_UNAUTHORIZED_STORAGE=true \
  -e ONLYOFFICE_HTTPS_HSTS_ENABLED=false \
onlyoffice/documentserver:8.3.2-d -i -t: 运行模式--name: 容器名称-p: 端口映射-v: 挂载配置文件-e: 环境变量JWT_ENABLED: 是否启用 JWTUSE_UNAUTHORIZED_STORAGE: 是否启用未授权存储ONLYOFFICE_HTTPS_HSTS_ENABLED: 是否启用 HTTPS HSTS
添加域名解析
nginx 配置文件添加如下内容
nginx
server {
  listen       80;
  server_name  onlyoffice.example.com;

  location / {
    proxy_pass http://127.0.0.1:8088/; #反向代理
    proxy_http_version 1.1;
    proxy_set_header Connection "";
    proxy_set_header Host $host;
    proxy_set_header X-Real-IP $remote_addr;
    proxy_set_header X-Forwarded-For $proxy_add_x_forwarded_for;

    # 添加 WebSocket 支持
    proxy_set_header Upgrade $http_upgrade;
    proxy_set_header Connection "upgrade";
  }
}重启 Nginx
sh
sudo nginx -s reload